How to Master Procreate’s Brush Settings
Blog post description.
ART
3/25/20253 min read


Procreate is an incredibly powerful digital painting app, and one of its standout features is the customizable brush settings. Understanding how to tweak brush opacity, flow, jitter, and pressure settings will help you create a variety of unique strokes and textures suited to your art style.
In this tutorial, we’ll break down the Brush Studio, explain key settings, and guide you in making a custom brush that fits your needs.
Step 1: Accessing the Brush Studio
To adjust brush settings in Procreate:
Open Procreate and select the Brush tool from the top toolbar.
Tap on any brush to use it, then tap again on the brush to enter the Brush Studio.
This is where all the magic happens! Here, you can fine-tune existing brushes or create entirely new ones.
Step 2: Adjusting Opacity and Flow
Opacity (Transparency of Strokes)
Opacity controls how transparent or solid your brush strokes appear.
Navigate to the General tab in Brush Studio.
Adjust the Opacity slider to control transparency.
You can also link opacity to pen pressure under the Apple Pencil settings for dynamic control.
Tip: Low opacity is great for soft shading and watercolor effects, while high opacity is best for bold lines.
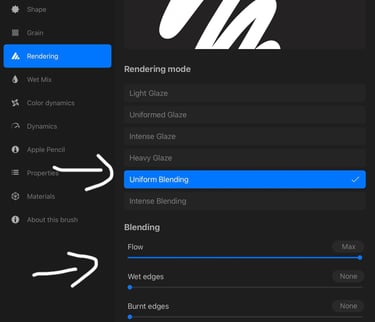
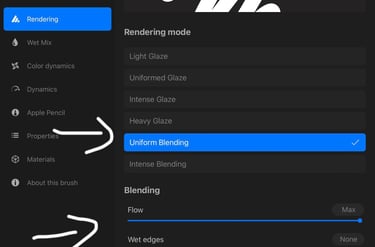
Flow (Ink Density in Each Stroke)
Flow determines how much "paint" is laid down with each stroke.
Go to the Properties tab in Brush Studio.
Increase or decrease the Flow slider to
adjust ink density.
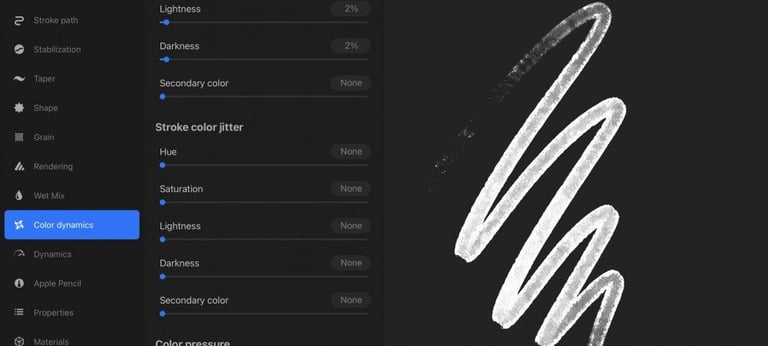
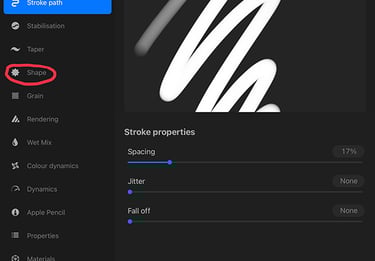
Step 3: Fine-Tuning Jitter for Natural Textures
Jitter adds randomness to brush strokes, making them look more organic.
In the Stroke Path tab, adjust the Jitter slider to scatter the brush shape along the stroke path.
Higher values create a rougher, grainier effect—great for textures like sand, snow, or fur.
Tip: Use jitter in combination with Spacing (found in the same tab) to create unique stippling or spray effects.
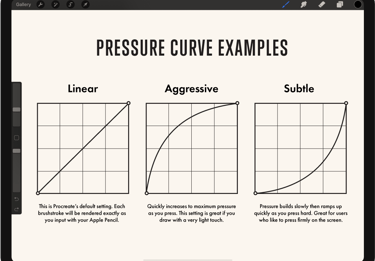
Step 4: Adjusting Pressure Sensitivity for Natural Strokes
If you’re using an Apple Pencil, you can adjust pressure sensitivity for more dynamic strokes.
Go to the Apple Pencil tab in Brush Studio.
Adjust Pressure Size to control how much your stroke changes based on how hard you press.
Modify Opacity and Flow settings under Apple Pencil for a more responsive brush.
Tip: Set pressure sensitivity for inking brushes to get fine, tapering lines and for painting brushes to mimic natural bristle effects.
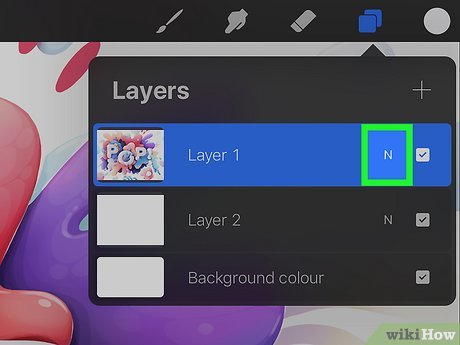
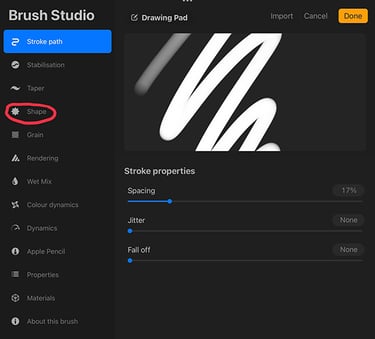
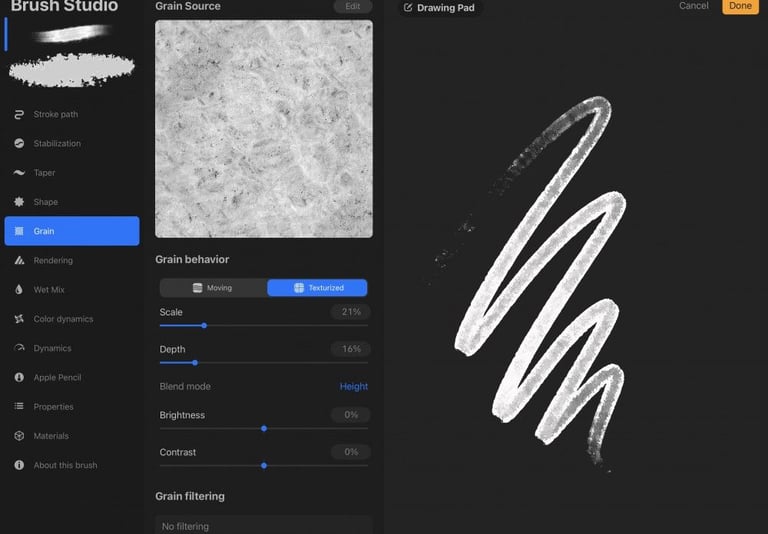
Step 5: Creating a Custom Brush
Now that you understand the brush settings, let’s create your own custom brush:
Open the Brush Library and tap the + button to create a new brush.
Choose a Brush Shape (under Shape tab) or import your own texture.
Adjust Opacity, Flow, and Jitter to refine the brush’s behavior.
Set Pressure Sensitivity for natural stroke variation.
Test your brush on a blank canvas and tweak settings as needed.
Final Thoughts & Practice Tips
Mastering brush settings in Procreate takes practice, but experimenting with different configurations can help you develop unique, custom brushes for your art style.
Try this:
Modify an existing brush and create two variations—one for sketching and another for painting.
Adjust pressure sensitivity and test how it impacts your line work.
Play with jitter settings to create randomized texture brushes.
With these settings, you can fine-tune Procreate’s brushes to perfectly match your creative workflow. Happy creating!

Support my work Through Your Generosity
Help us promote more articles and tutorials by donating today for access to our tutorial resources.
Join us in making a difference.
★★★★★